Starting Project and Engine build
The idea was to build a budget track bike using the FJ as the basis, I had a budget for £1000 to complete though I later found this to be a bit very optimistic. The donor bike would need to be stripped down to minimal weight and maximum power without loss of reliability and handle like a modern superbike!.
First was the bike. I wanted a FJ1100 as this was once the sportiest and lightest of all the FJ range so when one came up for £200 the project was off the ground. For £200 you don’t get a lot, it had been stood in a friend’s garage for over four years so it was sold as a non runner. The cosmetics were in average shape, but complete, so once I got the engine running by replacing the carbs (they had blocked up with old fuel and were impossible to clean, so beware don’t leave fuel in the carbs for any long length of time) it was onto the next stage.
Another friend (Gordon) had a FJ1200 3CV with over 90,000 miles on it, but during his ownership, he had heavily modified it with Wiesco pistons, Exup wheels, flat slide carbs and Dyna coils etc… After an exchange of £800 I acquired his heap!
The suspension, disc’s and cosmetics were in a right state, so before stripping to find the serviceable parts I threw it on a Dyno. Whilst It produced 115bhp at the back wheel the power curve was very poor and it filled the workshop with masses of oil fumes.
A standard FJ motor kicks out 106bhp so this motor was in a sick state considering all the performance bits. When I did a compression check I found that No2 cylinder was down 40psi, so an engine strip was in order. Another added problem was a slight oil leak on the crankcases, which I later found out it had been welded to repair a crack.
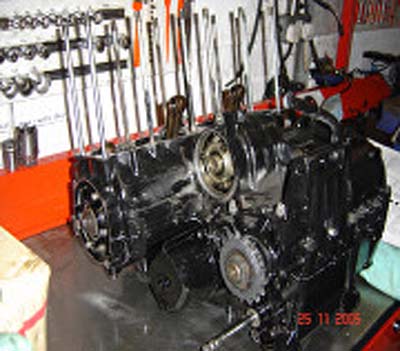
Engine stripped for rebulid;
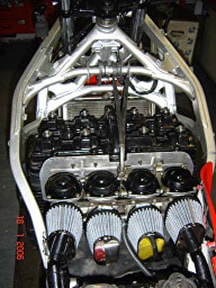
Engine refitted in frame. Carb's with S&B filter plus Dynojet kit ;
Carbs; note crankcase breather
Engine refitted in frame. Carb's with S&B filter plus Dynojet kit ;
Carbs; note crankcase breather
ENGINE
Upon stripping the engine I found three pistons with broken rings, one of which had a chunk missing and had caused damaged to the bore. The valves were pitted to the point that No 2 cylinders exhaust valves were replaced with new at a cost of £25 each. Using this head, due to it being gas flowed, I lapped all the valves in to get a good seal and fitted new valve seals.
I managed to purchase a replacement piston from the Wiesco importers plus a set of four piston rings, the only problem was they no longer manufactured the exact same pistons, so I was sent the closest they had, which I then found weighed 15 grams heavier, so a lot of machining was required to match all pistons.
Because the pistons were standard size (1188cc, though with slightly higher compression) I fitted them in a second hand set of newly honed out barrels.
Before the engine was re-assembled, I had the idea of fitting a XJR gearbox unit because this has a longer output shaft (gearbox sprocket shaft). This would allow the chain to clear the large 180/55zr17 tyre that I had planned to fit on the Exup rear wheel, as normally you can only fit a 160 or a 170 at a push.
Due to the XJR gearbox, I needed to fit a XJR gearbox casing, as this gives clearance to the sprocket and the longer output shaft.
I assemble it all together using the bottom end and crankcases from the FJ1100 motor due to the 3CV oil leaking crankcases.
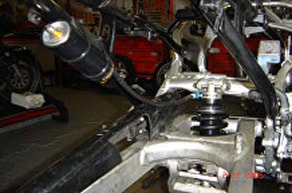
Penske rear shock with compression and rear rebound damping
R1 brake calipers with 320mm FZR Genesis EBS disc's, braided hoses and Brembo master cylinder
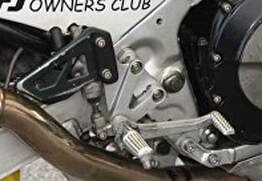
Footrest using GSXR parts
R1 brake calipers with 320mm FZR Genesis EBS disc's, braided hoses and Brembo master cylinder
Footrest using GSXR parts
Chassis
The wheels were checked for alignment and the rear was 1.5mm out to the right (I used my laser alignment kit, highly recommended, the workshop only charges £15 to set up wheels as even from factory, marks on the adjusters are always out), I corrected this with new spacers and due to the new XJR output shaft there was plenty of room for chain clearance, though I also needed to grind off some inner lugs that hold the footrest hangers on due to the chain now running very close to the frame. Both wheels were sent off to be power coated due to the poor condition of the paint, if fact the front was heavily corroded.
Any superfluous brackets were removed from the frame such as the shock remote unit bracket etc and the rear sub frame also had the same treatment. To finish it off, a quick lick of paint was applied to tidy it up.
To remove even more weight I removed the headlight and speedo unit, rear grab handles, air box, switch gear, mirrors, indicators, and the horn, I even trimmed down the wiring loom so that it simply runs the engine, this allowed all the ignition switch, flasher and starter relays to be made redundant.
The fairing now had a hole where the headlight was, so I plastic welded a light guard in its place and painted it black.
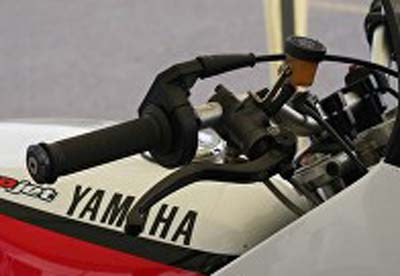
The handle bars were the next headache, they weigh over 3kg each inc the end weights, so the answer lay in fitting a set of light weight Renthal handle bars which were mounted directly to the top yoke using Renthal bar mounts. This also meant that the bars were lower and more forward than standard so aiding getting weight over the front end. I was unable to fit clip-on type bars due to having no clearance against the fairing.
The OE footplate and pegs were filed to room 101 and I grafted a set of GSXR750k standard footrests complete with gear lever and brake pedal. This raised the pegs up around 40mm and pulled them back 30mm so offering more ground clearance.
Quick action throttle fitted
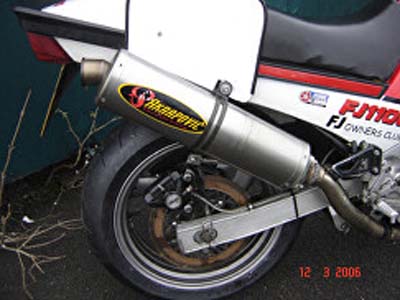
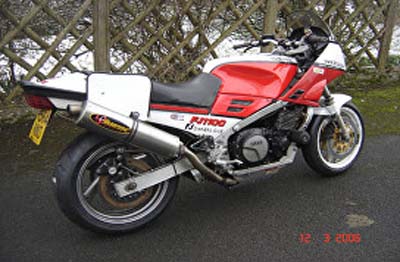
Akrapovic silencer fitted to Devil down pipes. Mounted high level for clearance
Many rules in the ACU for safety reasons like this oil collection pan. Hand built
Akrapovic silencer fitted to Devil down pipes. Mounted high level for clearance
Many rules in the ACU for safety reasons like this oil collection pan. Hand built
Brakes
I replaced the standard 3CV front brake calipers for the latest R1 light weight type (gold) acting on the new FZR Genesis 320mm EBC iron disc’s.
Braided hoses were fitted all round using the budget Zinc type to keep cost down (haven’t got to worry about salt weather corroding the fittings).
EBC fully sintered double H pads were fitted on both the front and rear calipers for their high performance. I had fitted a ZZR front brake master cylinder as these are much better than the OE ‘FJ’ items but on testing the brakes on the road I realised that it would need to be improved even further so I fitted a Brembo radial master cylinder unit at a cost of £180, well stopping is important!
The rear caliper was left standard but due to the exhaust system being fitted as close as possible to the body work, the unit was relocated slightly by rotating it rear wards. This needed a longer torque arm, which was manufactured out of stainless steel (same as the one in the catalogue). To clear the larger tyre (180/55) the arm was shaped to give clearance around this
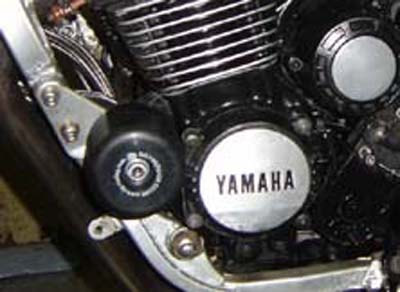
Engine mushroom from the XJR1300
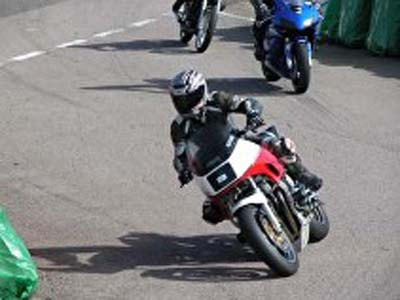
'Doc' going through the Bus Stop at Mallory
The FJ Racer Mark 1 complete
'Doc' going through the Bus Stop at Mallory
The FJ Racer Mark 1 complete
Exhaust
The exhaust system fitted to the 3CV was a Devil, this was a stainless 4 into 1 type (designed for top end), the Devil can was massive and very heavy.
So to make the exhaust system have more ground clearance I decided to change the link pipe so that it was an up swept type and used a second hand Micron Carbon Race can that I had got from the owner of the 3CV.
The problem was it was very noise and I’m sure it would have a problem with the race 105 db limit. So I fitted a spare Akrapovic can from my GSXR, the result looked quite smart and offered a massive amount of ground clearance.
ACU Rules
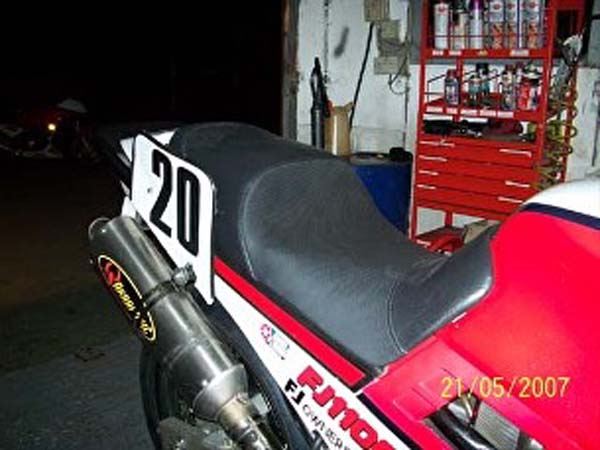
To race the FJ you have to make sure the bike meets the Auto-Cycle Union regulations, this requires that the drain plug, filler cap and oil filter housing bolt are locked wired, this was done by simply drilling a small hole in them and a location point. Each bike also needs a number plate; these are placed at the front and to each side of the bike. Using sheet 1mm aluminium I fabricated up two plates 285mm * 235mm, these were mounted near the tail unit and seat.
The front was simply done by using white fablon cut to cover the headlight area and fairing.
The hardest rule was the need for a oil containment underneath the engine so if there was ever an oil leak the container would be able to hold 50% of the engine’s oil, in the FJs’ case this was 2 litres.
As standard the FJ has a belly pan but there seemed little hope of converting one to hold any fluid, so I fabricated a complete new lower fairing out of 1mm sheet aluminium. It took me a day to produce and having no access to an ali welder I screwed the fairing together and to make a good seal I used Araldite to seal the joints.
My only concern was to get a full 2 litre capacity the fairing only had 125mm clearance from the ground, so long as I don’t hit any sleeping policemen I should be ok!.
I fitted a R&G rear sprocket guard (£30) on the swinging arm; this is a safety item to stop fingers getting trapped between the chain and sprocket.
Finally there needed to be an oil catch tank as I had removed the air filter and the crankcase isn’t allowed to breathe just through a filter. You often see racers with Red Bull cans as breather containers but I neatly used a Scottoiler 500cc refill bottle and mounted this in front of the battery box using a clamp I had fabricated, again out of 1mm Ali.
Misc
Something I knocked up was a support that acts just like a side stand. Because of the need to remove both centre and side stand when you step off the bike it difficult to hold the bike up and fit a paddock stand by onesself, so I fabricated a stand that simply located on the same location as the side stand and can be fitted whilst still sat on the bike.
Because of the removal of the footrest hangers I had the swing arm bolt reduced by 30 mm; this made it flush fitting to the bare frame.
To aid crash protection I fitted some R&G crash bungs. These are massive bits of plastic that are designed to fit the XJR and happen to fit the FJ perfectly. I was unhappy about using the Renntec engine crash bars because of ground clearance and weight (not a problem on the road!)
I set up the gearing to a standard FJ1100 gearing, 17t front and 41t rear. Fitted a DID racing chain which is lighter than the road ZVM chains and equally as strong.
Road Testing
I road tested the bike on the road to set up the suspension and to bed the new piston and rings in. After 400 miles I placed it on the Dyno.
Now it’s a matter of putting the FJ Racer on the track in a race. The class it can run in is called ‘Forgotten Era’. This allows any road bike that was manufactured before 1989, mainly racing is Yamaha Exup and Suzuki GSXR1100/750’s.
I know it’s a tall order to put the FJ sports tourer up against them but then again it might embarrass a few, so I’ll let you know how I get on towards the end of the year.
Testing at Mallory Park; March 2006
It’s all very well building a bike but it’s a different matter actually racing it. Things that you have done to the bike may look good but can perform poorly (look over function).
With the FJ Racer I’ve done every thing for performance, even the frame has its original flaky silver paint, to be honest it looks a little rough, perhaps if I do well this year I’ll clean it up over the winter.
Before completing at the first race at Anglesey I took the ‘Fudge’ to Mallory for a track day. I was pleased with the bike, it went well and I was managing to consistently lap at around 2”03. The guy next to me (ex racer) was on a slick shod Yamaha R1 2001 model and we clocked him doing 2”04.
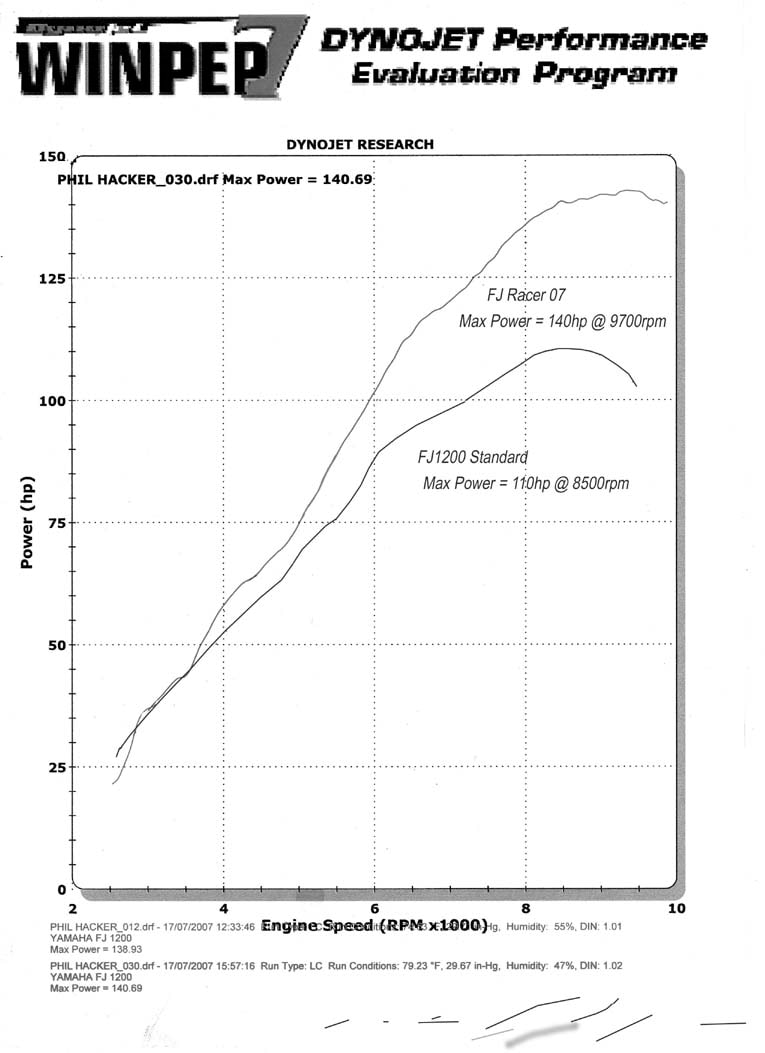
The power comes in really good from 6,000 revs and where a normal FJ motor tails off power at 8,500, this motor keeps pulling well past the red line at over 9,500. Accelerating from Dunlop Esses the FJ was lifting the front wheel at max revs in third gear at a speed of over 110mph, not bad for a 22 year old bike!
The handling was impressive to, no wobbles or weaves, I increased the rear rebound on the Penske rear shock from stock setting, it was a shame that the front has no form a damping adjustment as this could do with firming up, I will try thicker 15 weight oil at a later date.
The tyres were 120/70ZR17 and 180/55ZR17 Pirelli Dragon Corse (Race compound) these are not the latest spec tyres but was convinced by being £50 a pair cheaper. The grip takes some getting use to as you can carry a lot of corner speed and accelerate hard whilst banked over compared to say a fast road tyre like the Bridgestone 012SS
September 2006; Update of FJ Racer mods
Prior to the race I made a few changes to the FJ Racer. First was to remove the Gilles handle bars and replace them with a modified straight tube handlebar, reason was, simply, the handle bars would touch the tank slightly and the tube bars are lighter and neater.
The biggest problem with the FJ, compared to the FZR’s I’m racing against, is its weight. I worked out that a standard GSXR rear wheel was a massive 3kg lighter than the Exup wheel I have fitted, (this shows you how bikes over the last few year have developed). While this was being fitted I used the smaller OE Gixer rear brake disc and I adapted a 916 rear brake caliper to fit (this is half the size of the FJ item).
I have had problems with the exhaust decking out so, to sort this out, I attacked it from both sides. First I replaced the rear Penske spring with the next weight up (19kg) as it mainly happened in the dip through Schools corner at Anglesey. Secondly I fitted an Akrapovic 4-2-1 exhaust system that was originally designed for the XJR, this was also 3kg lighter that the old Devil 4-1 system. This allows the exit pipe to fit tighter into the chassis, to the point that I had to cut off the centre stand location mounts.
With all these lightening mods, I have got about 36kg off the Racer compare to the standard FJ1100 (252kg wet), this works out about 5 stone.
I was having problem with the seat height due to the bike being so jacked up for ground clearance, the solution was to fit an old 916 seat onto the FJ base (over the winter I will get it professionally fitted so it looks better). This flatter seat also helps when I’m hanging off the bike whilst cornering.
Finally I took it over to Tim Blakemore for a horse power check on his Dyno as last time I did this it was showing 117bhp and this was on a tight 400 mile only (new rings fitted) engine. That time I was told to up the main jets and lean the bottom end off which I had done by increasing the main jets to 120 and lower the needle to the lowest position. With this and the new exhaust system the motor kicked out an impressive 132bhp at the back wheel. Yes you have read that right!
Tim told me that an early R1 on this Dyno produces between 125 to 130 hp so not bad for a 22 year old engine. Also he mentioned it was still too lean on max revs and I should increase the main jets again and this might yield another 4 hp, so I fitted 125 main jets.
